

Verified on V Rising patch 1.1 (Invaders of Oakveil, April 2025). Values may change with future updates.
Most blood mage guides tell you what to equip. Almost none tell you how many summons you can sustain simultaneously — or why getting that count wrong by even one ability slot leaves 20–40% of your sustained pressure on the table. Worse, guides written before the April 2025 Oakveil update are recommending a skeleton composition that no longer exists. The warrior-to-mage ratio changed. Skeleton lifetime dropped. The cooldown rate system was rebuilt from the ground up. If your source doesn’t mention any of this, stop reading it.
This guide covers the actual numbers: the peak summon-density window, how Scholar blood’s Tier 3 reset creates a feedback loop that keeps your minion army alive between Army of the Dead casts, and three distinct loadouts for solo PvE, group PvE, and PvP defense — with genuinely different spell choices for each.

What Oakveil Changed — and Why Every Old Guide Is Wrong
Four specific changes in patch 1.1 invalidated the summoner meta from 2024:
Skeleton lifetime dropped from 8 seconds to 7 seconds. That single second cuts 12.5% off every summon’s useful life. Old guides advised using that 8-second window to reposition and flank — at 7 seconds that’s no longer a safe assumption. If you aren’t within striking range when Army of the Dead lands, your warriors expire before the enemy takes meaningful damage.
Army of the Dead’s composition shifted from 5 warriors + 3 mages to 6 warriors + 2 mages. This matters because skeleton mages deal 50% of your Spell Power per hit versus a warrior’s 30%. Pre-Oakveil builds were optimized around three mages doing the heavy DPS work. Post-patch, you have two mages — substantially less magic burst — compensated by a sixth warrior adding body-blocking mass. If your old build stacked armor jewels for mage damage uptime, those are now under-performing.
Soulburn lost its silence. Builds that used Soulburn as a CC + drain combo — freezing targets long enough for mage DPS to land — no longer work. Soulburn now deals 50% damage to nearby enemies and leeches 100% health, which is useful sustain, but it no longer interrupts anything. Remove it from any CC-dependent rotation immediately.
The cooldown system was rebuilt. Old flat cooldown reduction is gone. The new system “speeds up the rate at which an ability resets” — it’s rate-based, not subtracted from a static number. This changes how Scholar blood stacks. At Tier 2, the 7–14% cooldown rate doesn’t reduce your 11-second Death Knight cooldown by 1.54 flat seconds — it accelerates the rate of the entire bar, which compounds when combined with Veil of Bones’ 7-second reduction per dash. The interaction is stronger than it looks on paper.
One new addition worth noting: Unholy Coating is entirely absent from pre-Oakveil guides because it didn’t exist. It makes your next primary attack deal 40% bonus magic damage, inflict Condemn, and conjure a bone spirit that circles the target. It’s not a summon ability, but it fits naturally into the gap between Army of the Dead casts as a bonus Condemn application — which triggers Arcane Animator’s skeleton mage proc.
Unholy School Abilities — What You’re Actually Working With
The Unholy toolkit is narrower than people expect. Strip out the ultimates and the dash, and your active summon options are four spells.
| Ability | CD | Summon Type | Duration | Role |
|---|---|---|---|---|
| Death Knight | 11s | 1 Death Knight | 6s | Primary summon; AoE melee |
| Ward of the Damned | 11s | Up to 5 skeletons | Until killed | Summon + shield in one slot |
| Veil of Bones | 8s | 1 skeleton warrior | Until killed | Dash + summon; also reduces CDs by 7s per use |
| Corrupted Skull | ~10s | 1 skeleton warrior | Until killed | Ranged skeleton + 80% damage + Condemn |
| Army of the Dead | ~60s base | 6 warriors + 2 mages | 7s | Ultimate burst window |
Death Knight is your most reliable single-target summon. At 11 seconds cooldown and 6 seconds duration, there’s a 5-second gap every cycle — but Scholar blood and the Veil of Bones dash reduce this to nearly zero uptime loss. Its AoE swing (50% magic damage per hit to nearby enemies) makes it useful even in multi-target fights.
Ward of the Damned is underrated because most players treat it as a defensive ability. The correct framing: it’s a summon generator with a shield as its cost mechanic. Block an attack, get a skeleton. Block five attacks consecutively, cap out at five skeletons that persist until killed — not for 7 seconds. Unlike Army of the Dead summons, Ward skeletons don’t expire on a timer. They stay until an enemy kills them. In solo PvE against sustained bosses, two or three Ward skeletons that survive the opening burst become permanent melee pressure with no cooldown penalty.
Veil of Bones does double duty. The dash itself generates a skeleton warrior, and each use cuts 7 seconds off your cooldowns. Use it on cooldown during the gap between Army of the Dead casts and you’re actively pulling your Death Knight back faster.
The Summon-Density Math
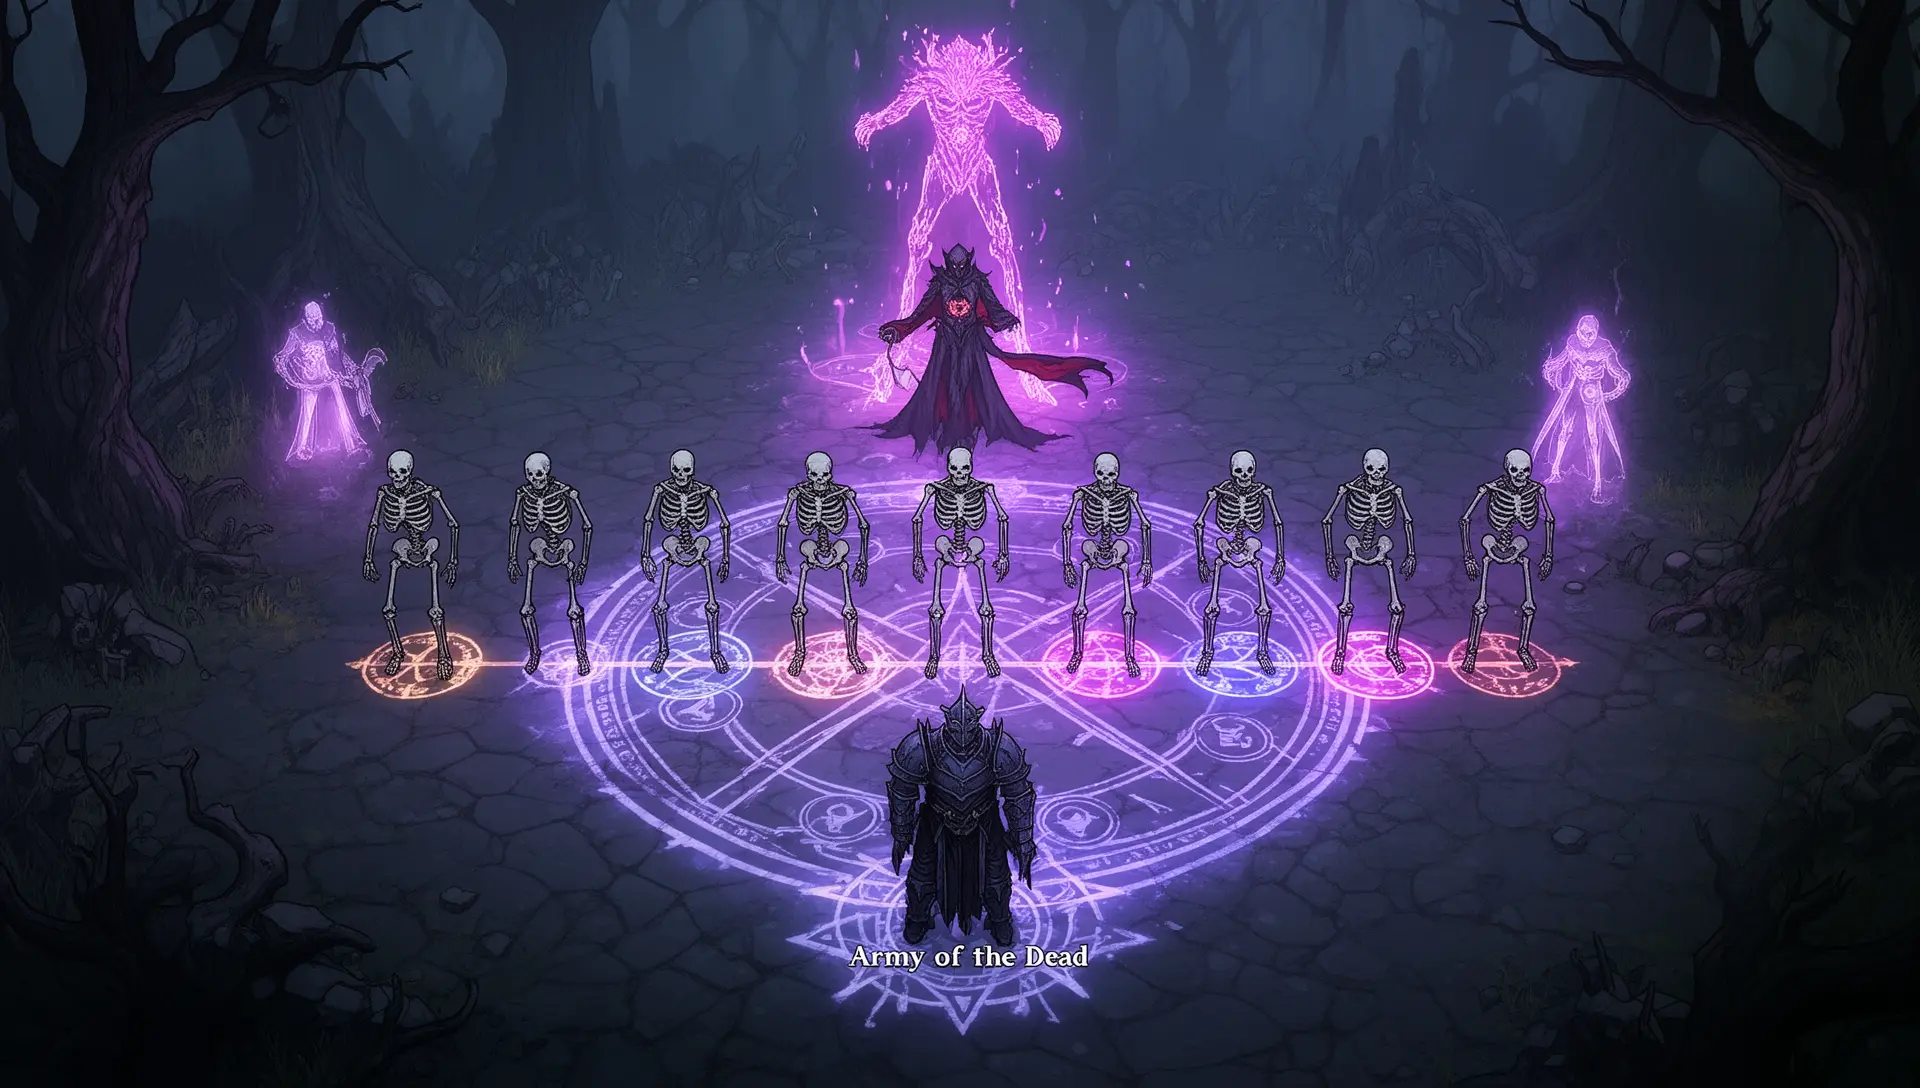
This is the section no other guide covers. The question isn’t “which spells summon minions” — it’s “how many summons can I have up simultaneously, and when?”
Your peak window opens the moment Army of the Dead fires. In the 7 seconds that follow:
- Army of the Dead contributes 8 summons (6 warriors + 2 mages)
- Death Knight contributes 1 — if you timed the cast in the 2–3 seconds before Army fires while CD was near zero
- Ward of the Damned skeletons that survived from the previous cycle can still be alive — up to 5
- Veil of Bones on cooldown adds 1 per dash (8s CD)
Peak simultaneous summons: 10–15 depending on Ward survival and dash timing. This window lasts 7 seconds before Army’s skeletons expire.
After the peak window closes, you’re left with whatever Ward skeletons survived + 1 Death Knight if the CD resolves. That’s the gap problem — Army of the Dead’s base cooldown is around 60 seconds, Veil of Bones reduces it by 7 seconds per dash (you can realistically dash 3–4 times before the next Army cast), and Scholar blood Tier 2 adds 7–14% cooldown rate. The math: 60s base — ~25s from 3–4 veil dashes — ~15% Scholar rate acceleration = approximately 30–35 seconds between Army casts. That means a 23–28 second gap where you have no Army summons.
This is the real job of the blood mage: managing the gap. During those 23 seconds, your active summons are: Ward skeletons (permanent, up to 5, but dying to enemy damage), Death Knight cycling on 11s, and Corrupted Skull generating individual skeletons. The summon count drops from 10–15 to 2–6. Your play during this window determines whether the build holds pressure or collapses.
Scholar blood Tier 3 partially solves the gap. When you cast Army of the Dead (your Ultimate), ALL spell cooldowns reset instantly. That means:
- Army of the Dead fires — 8 summons appear
- Immediately, Death Knight is at 0 cooldown — deploy it for +1
- Ward of the Damned is at 0 cooldown — deploy it for +5 potential
- Corrupted Skull is at 0 — fire it for +1 more
In the 7-second window after Army fires, you can deploy three additional ability casts at 0 cooldown, layering up to 5 extra summons on top of the 8 from Army. The Scholar Tier 3 reset is the difference between a 7-second burst and a sustained 12-15 summon window.
Scholar Blood — The Cooldown Feedback Loop, Tier by Tier
Scholar blood is the correct choice for this build. Here’s why each tier matters — and which tier is worth prioritizing before moving on.
Tier 1 (7–14% Spell Power + 10% Shield Efficiency): Minor damage and a token shield. Worth having but not worth farming 100% purity for. If you land a 30–50% Scholar, this is fine for early game.
Tier 2 (7–14% Spell Cooldown Rate + shield for 25% of your Spell Power when casting): This is the first meaningful tier for summoners. The cooldown rate increase under the new rate-based system compounds with your Veil of Bones dash reduction. The passive shield on every cast turns your active spell use into a constant trickle of mitigation — each Ward of the Damned cast, each Death Knight, each Corrupted Skull adds a small shield. In solo PvE, this is relevant; in group content, it’s secondary to the cooldown benefit.
Tier 3 (10–20% Ultimate Power + reset ALL spell cooldowns on Ultimate use): The build-defining tier. This is the CD feedback loop. Casting Army of the Dead resets Death Knight, Ward of the Damned, Corrupted Skull — all at once. At 100% purity with Tier 3, you essentially get one “free round” of all your summoning abilities immediately after every Army cast. Target this tier before optimizing anything else.
Tier 4 (+12 Spell Charge Gain): Useful if any of your abilities use charges rather than straight cooldowns. Minor for most blood mage loadouts.
Tier 5 (×1.2 on all tier effects): Tier 2’s cooldown rate reaches ~16.8%, Tier 3’s Ultimate Power reaches ~24%. A significant upgrade if you can reach and maintain 100%+ quality — which means the Blood Homogenizer from Lucile the Venom Alchemist becomes a priority unlock.
Why not Rogue or Creature blood? Rogue’s critical strike and weapon damage bonuses target a completely different weapon role — it’s built for Longbow charged shots, not spell casting. Creature gives you health and healing, which sounds appealing for a frontline summoner, but it doesn’t reduce the Army gap window or enable the Scholar Tier 3 chain. You trade the entire feedback loop for survivability you could get from Ward of the Damned instead.
Recommended Loadouts by Playstyle
| Slot | Solo PvE | Group PvE | PvP Defense |
|---|---|---|---|
| Dash/Veil | Veil of Bones | Veil of Bones | Veil of Bones |
| Slot 1 | Death Knight | Corrupted Skull | Death Knight |
| Slot 2 | Ward of the Damned | Soulburn | Ward of the Damned |
| Ultimate | Army of the Dead | Army of the Dead | Army of the Dead |
| Passive | Arcane Animator | Sanguine Master | Arcane Animator |
| Key trade-off | Max summon density; Ward shields solo spikes | Skull generates Condemn; tanks absorb hits so you focus DPS | Death Knight + Ward skeletons body-block chokepoints |
Solo PvE: Ward of the Damned is essential here because no ally is absorbing hits for you. The shield and summon generation from blocking one or two attacks per fight is enough to prevent spell-interrupt deaths. Arcane Animator gives your Condemn applications a 15% chance to proc a free Skeleton Mage — with Unholy Coating generating Condemn on primary attacks, you get occasional bonus mages without spending a cooldown.
Group PvE: Your allies handle the tanking. Swap Ward for Corrupted Skull, which delivers a ranged skeleton + Condemn application at no risk. Soulburn’s 100% health leech becomes meaningful when multiplied across three targets simultaneously. Sanguine Master scales your leech when minions attack — in a group environment where your summons are reliably hitting multiple enemies, this passive compounds quickly.
For group content, consider running Jakira the Shadow Huntress’s Mosquito spell as an optional Illusion-school utility pickup. Mosquito creates a stationary taunt that pulls nearby enemies for ~1.7 seconds — during a boss fight, placing it mid-fight draws adds away from your caster position long enough for Army of the Dead to expire cleanly before the next wave engages.
PvP Defense: Your army doesn’t chase. Against a player who can kite, pure offense fails. The correct PvP use is positional — your minion wall forces opponents through a chokepoint or burns their dashes clearing your skeletons instead of reaching you. Death Knight + Ward skeletons in a corridor denies movement. The moment an opponent commits a dash through your minion line, they’ve burned their cooldown and you can chain Army of the Dead.
Gear and Jewel Priorities
Spell Power is the single most important stat for this build — not for your own damage, but for your minions’ survivability and output. Minion health scales at 200% of your Spell Power. At 100 Spell Power, each skeleton has 200 HP. At 150 Spell Power, they have 300 HP — 50% more durability, staying alive longer in the summon window, dealing more hits. Warrior damage is 30% SP per swing, mage damage is 50% SP per hit. Raising Spell Power benefits every element of the build simultaneously.
Armor — Dracula’s Maleficer set (Gear Level 9): +812 Total Max Health, +6 Spell Power, +16% Spell Critical Strike Chance, +10% spell leech on two or more pieces. This is the correct armor for the build. The spell leech interacts with Soulburn and Sanguine Coil if you’re running the group PvE variant.
Stat priority order:
- Spell Power (minion HP + damage scales directly)
- Spell Cooldown Recovery Rate (reduces Army of the Dead gap)
- Spell Critical Strike Chance (+16% from Maleficer is a good baseline)
- Max Health (survivability; less critical once Ward of the Damned is generating shields)
Jewels — three priority modifiers:
- Death Knight duration extension (+25–40% lifetime): Extends the Death Knight’s 6-second uptime to 7.5–8.4 seconds — nearly matching skeleton warrior duration. This closes the “Death Knight expires before Army refires” gap.
- Skeleton spawn chance on Condemn kills: Arcane Animator already gives 15% — a jewel that adds another 10–20% on top creates reliable free skeletons in mob-heavy content.
- Minion health %: Stacks multiplicatively with the Spell Power HP formula — a 20% minion health jewel on top of 200% SP scaling means skeletons effectively have 240% HP instead of 200%.
Alternative Death Knight jewel: Summon Skeleton Mage on Death Knight expiration. This converts your 11-second cycling Death Knight into a persistent Skeleton Mage whenever it dies — if the Death Knight is killed by an enemy rather than expiring naturally, you get the mage proc while the enemy wasted an attack. In boss fights this is mostly theoretical, but against groups of mobs it triggers constantly.
Positioning Logic — The Part Every Other Guide Skips
Summons in V Rising attack the nearest enemy in aggro range, not enemies you’re targeting. If you place your Army of the Dead while standing too close to the target, all 8 summons converge on a single point and an AoE attack removes them simultaneously. The correct placement:
Cast Army of the Dead 2–3 body-lengths ahead of your position, directly between you and the target. The summons materialize as a wall, warriors in front absorbing melee attacks, mages behind dealing damage. You continue moving backward after the cast. This creates separation: the enemy must first clear your 6-warrior wall to reach you, which takes most or all of the 7-second window.
Ward of the Damned skeletons appear at your location, not at a target. After generating them by blocking attacks, move forward to deploy them in front of you — they follow you up to leash range (roughly 15–20 meters), but once you cast them into the fight by launching Ward’s secondary wave, they’ll hold position on the target. Never dash backward without first sending Ward’s wave — if you flee while the skeletons are still attached to you, they follow and cease attacking.
In corridor or doorway content (dungeon PvP, Castle Heart defense), summon Army of the Dead directly inside the entrance. Enemy players entering the doorway must commit through 6 warriors. The first person through typically burns their dash, leaving them in melee range with your Death Knight cycling next. Most players don’t have the CC to clear 8 summons before Army of the Dead is resetting — especially after Scholar Tier 3 fires your Ward and Death Knight at zero cooldown immediately after.
Soul Shard of Solarus — The Endgame Upgrade
The Soul Shard of Solarus is the Unholy-associated shard, dropped by Solarus the Immaculate (Level 86, Fortress of Light, Silverlight Hills, Eastern edge). Equipping it gives your build three permanent buffs:
- +15% Spell Cooldown Recovery Rate: Stacks with Scholar Tier 2’s 7–14% rate. Combined, your effective cooldown rate sits at 22–29% — which meaningfully reduces the Army gap window from 23–28 seconds to approximately 18–22 seconds.
- Death Knight spawns passively on spell hits: Every spell cast has a chance to generate a Death Knight at the target. With Corrupted Skull, Ward of the Damned, and Unholy Coating all triggering this, you’re generating Death Knights during the gap window without spending the dedicated ability slot.
- Fallen Angel ultimate replaces Army of the Dead: This is the major choice point. Fallen Angel is a targeted, directional summon burst rather than Army’s centered AoE. Evaluate: if you’re running solo PvE content where enemies spread out, Army’s AoE placement is more reliable. If you’re doing PvP or dungeon content where enemies are funneled, Fallen Angel’s directionality is sharper.
Solarus is a Level 86 three-phase boss. Attempt only at Gear Level 25+ Ancestral weapons with full Dracula’s Maleficer equipped. The boss fight itself is well-suited to the blood mage build — Solarus spawns adds during phase transitions that your Army of the Dead will auto-target while you handle the main boss.
When Blood Mage Beats Physical Builds
This build outperforms physical alternatives in three specific scenarios:
Phase-transition bosses with adds. Solarus the Immaculate spawns adds during his three phases. Your Army of the Dead auto-targets them, keeping the field clear while you focus on the boss. A physical build player is manually switching between boss and adds, breaking their rotation. Your rotation doesn’t change — Army of the Dead handles the side work.
Charge-mechanic bosses. Bosses like Megara the Serpent Queen (Level 88, Venom Blades Bastion) have directional charge attacks. Army of the Dead placed ahead of you absorbs the charge. The warriors take the collision; you take no damage. A physical melee build must dodge manually or take the hit.
High-defense or temporary invincibility phases. Some boss phases have brief invincibility windows where direct damage is impossible. Your summons keep attacking — applying Condemn, building stacks, maintaining pressure — so when the window closes, the boss enters the vulnerable phase already Condemned. Physical builds that rely on burst into the opening window restart from zero.
The build is weakest in offensive PvP raids and any encounter requiring sustained single-target burst in under 10 seconds. Your minions cannot chase a fleeing player, and Army of the Dead’s 7-second duration means it’s not a burst tool — it’s sustained area pressure that requires the enemy to fight your army on your terms.
Counter-Play — How to Beat This Build
Understanding how to counter the blood mage makes you a better player of it — you’ll anticipate what opponents are trying to do and position to deny it.
AoE into the summon cluster: All 8 Army of the Dead summons appear within a 5-meter radius. Any AoE ability that covers that area removes most of your burst window simultaneously. If you notice an opponent grouping your summons with an ability, you’ve been read — next time, place Army of the Dead in a spread pattern by pre-aiming.
Attack during the Army gap: The 23-second window between Army casts is when blood mages are weakest. A coordinated opponent (or a player who has fought summoners before) will pressure hard immediately after your Army expires, forcing your Ward and Death Knight into purely defensive use. You have no burst tool until Army resets. Use Veil of Bones dashes aggressively during this window to pull the CD faster.
Kite outside leash range: Summons have a leash distance — they disengage if the target moves beyond roughly 15–20 meters. A mobile player who keeps running after Army fires will cause your warriors to disengage and return to you, wasting most of the window. Counter: place Army of the Dead slightly ahead of a retreating opponent’s path, not on their current position.
Burning damage: Your skeletons don’t self-heal and don’t run from fire. A sustained burning DoT on the position where Army lands will kill most of the wave before 7 seconds is up. In PvP, this is the strongest counter to the blood mage’s peak window.
Frequently Asked Questions
Is the blood mage viable in PvP? Yes — defensively. If you’re defending a Castle Heart or a chokepoint, the blood mage is strong. Offensive PvP raids against mobile players who kite are difficult because summons can’t chase. The build rewards positioning and punishes opponents who stand and fight your army. It struggles against players who commit to distance and force you into the gap window.
Can I run Scholar blood at low purity? Yes, but sequence the tiers deliberately. At 30–50% purity you get Tier 1 (small Spell Power boost) — passable for leveling. Farm 80%+ before committing to this build in earnest, because Tier 2’s cooldown rate is where summoner efficiency starts. Tier 3 (100% purity) is the build-enabling reset. Don’t invest in the full gear set until you can consistently maintain 80%+ Scholar purity.
Do minion stats actually scale with my Spell Power? Yes, and meaningfully. Skeleton warrior HP = 200% of your Spell Power. At 80 SP, your warriors have 160 HP and die quickly. At 150 SP (achievable with Dracula’s Maleficer + jewels), they have 300 HP and survive two to three boss hits. This is why Spell Power is your primary stat — you’re not just buffing your own damage, you’re buying your army survival time.
What’s the best server type for a summoner? PvE or PvE/PvP hybrid. Pure PvP servers punish the slow setup and the visible Army of the Dead animation, which telegraphs your position and timing to experienced opponents. On PvE servers, the build’s gap management is primarily a mechanical challenge against AI, where the Army timing is more forgiving.
For more on choosing spells across all magic schools, see our V Rising Best Abilities guide. For a full breakdown of blood type mechanics, see our V Rising Best Blood Types guide. And if you’re building this character from scratch, the V Rising Beginner’s Guide covers the fundamentals of the magic system and blood altar before you reach Unholy school spells.
Sources
- “V Rising Summoner Build Guide (Update 1.1)” — BisectHosting
- “V Rising 1.1 Patch Notes” — Stunlock Studios (Official)
- “V Rising Scholar Blood Guide” — BisectHosting
- “V Rising: All New Bosses in Invaders of Oakveil” — BisectHosting
- “V Rising Best Spells Ranked (Update 1.1)” — BisectHosting
- “V Rising Soul Shard Guide” — The Nerd Stash
- “Best Spells in V Rising Invaders of Oakveil 1.1” — Prima Games
- “V Rising PvE Builds: The Complete Guide” — Lawod

I've been playing video games for over 20 years, spanning everything from early PC titles to modern open-world games. I started Switchblade Gaming to publish the kind of accurate, well-researched guides I always wanted to find — built on primary sources, tested in-game, and kept up to date after patches. I currently focus on Minecraft and Pokémon GO.