
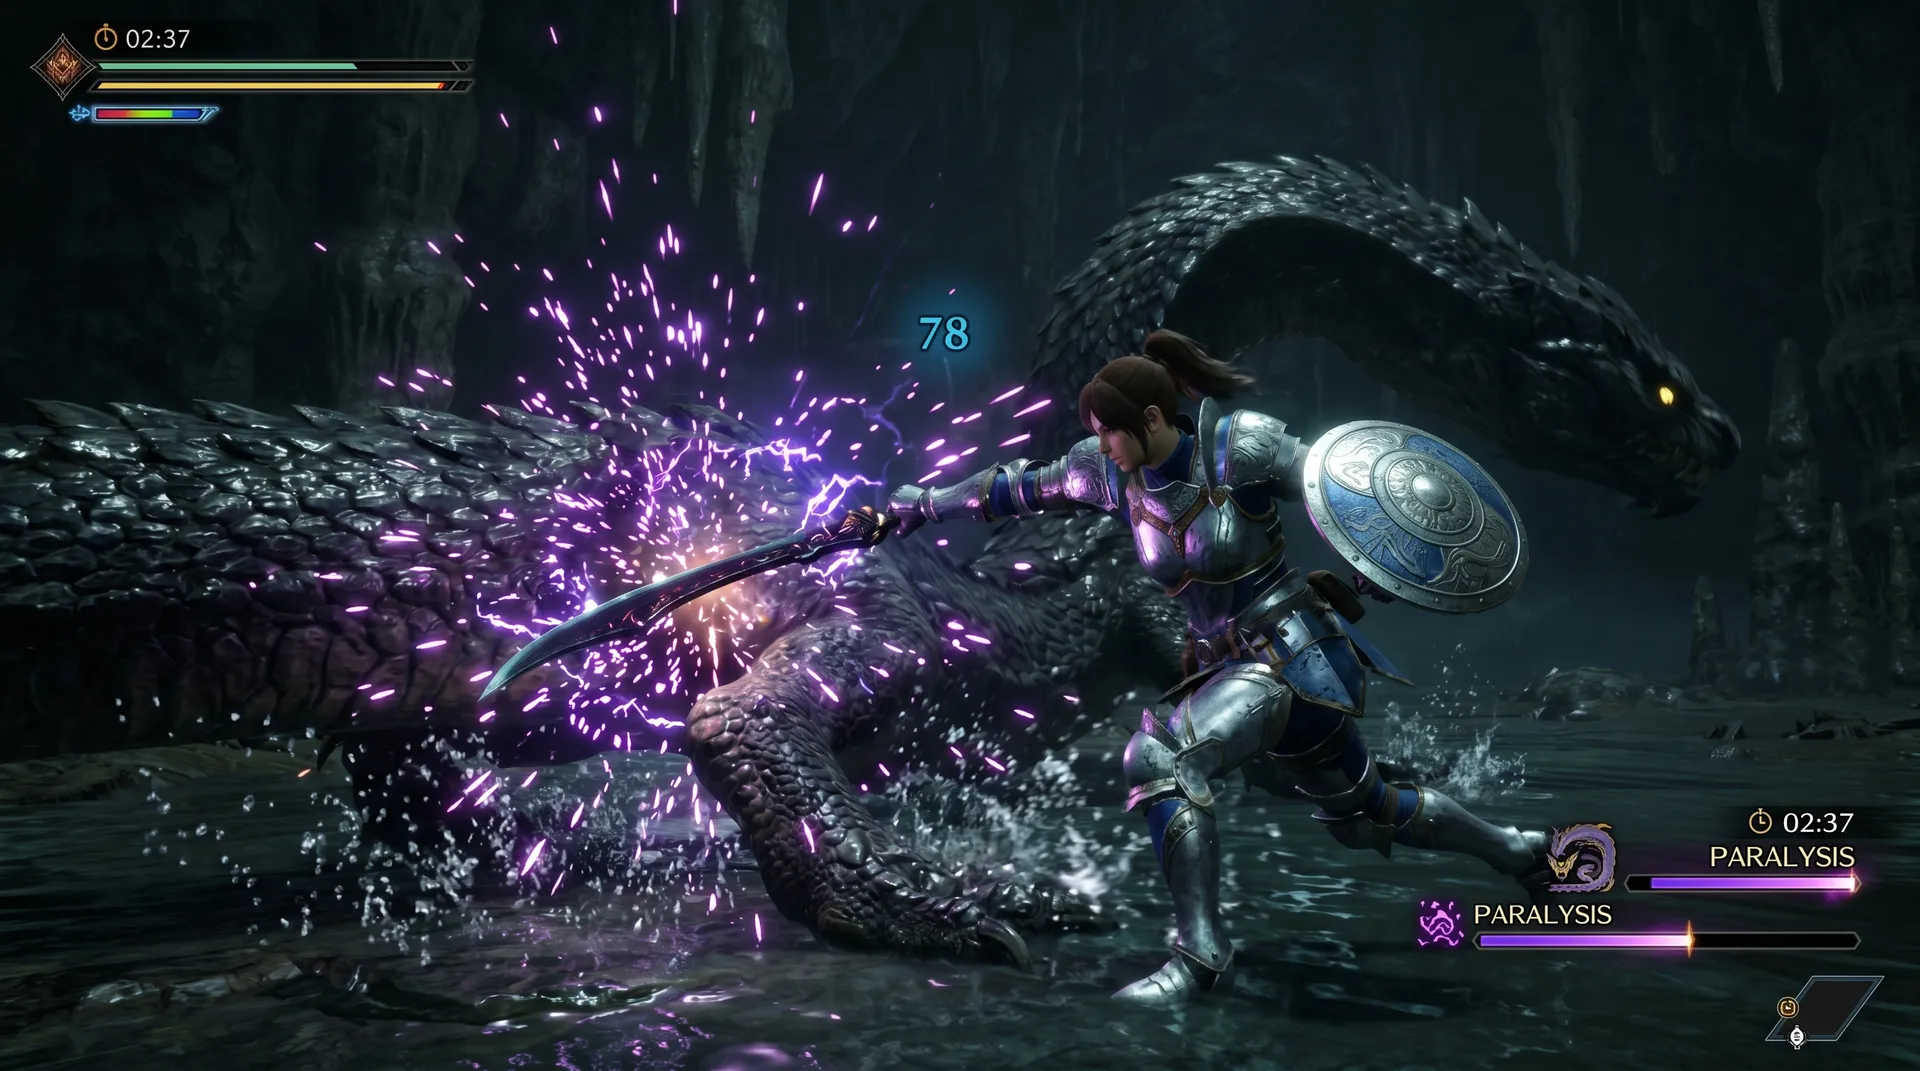
Every Monster Hunter Wilds guide calls Sword and Shield the “jack of all trades” weapon. That framing holds if you play SnS without a plan. Play it with intent — specifically around status application — and it becomes something closer to the game’s best single-weapon toolkit: the fastest melee status proc, party healing without ever sheathing, and burst damage windows only paralysis and sleep builds consistently create.
This guide covers the mechanics that make SnS tick, the math behind Perfect Rush timing, and three complete builds: a Beginner Perfect Rush set for new SnS players, a Para Specialist for those chasing status mastery, and a Wide-Range Support build that makes you genuinely indispensable in multiplayer. If you’re new to Monster Hunter Wilds entirely, start with our Monster Hunter Wilds beginner’s guide before diving into build specifics.
Verified against TU4, May 2026. Skill values and weapon stats may shift with future title updates — check in-game before committing to a build.
The Versatility Paradox: SnS Is Not What You Think
The “jack of all trades” label comes from casual SnS play: swap between blocking and slashing, occasionally mount, use a potion here and there. That is mediocre SnS — and it really is mediocre by the standards of dedicated damage weapons like Greatsword or Longsword.
The weapon’s actual strengths cluster around three specific roles that no other melee weapon handles simultaneously:
- Status application — SnS lands approximately 45 hits per minute in active combat [community estimate, 2]. At that rate, combined with Critical Status Lv3, paralysis procs faster than on any comparable melee weapon
- Item use without sheathing — Mega Potions, Dash Juice, Might Seeds — consumed mid-combo without an animation break. In a Wide-Range build, this mechanic shares those effects with your entire team
- Mount access plus shield KO contribution — Leaping Slash for mounting and Shield Bash strings for stun buildup run in parallel with your damage rotation, not instead of it
The meta reframe: SnS is a catalyst weapon. Apply paralysis, open the burst window, let your team exploit it. Heal reactively without stopping. Contribute to monster stuns as a side effect of your normal rotation. Maining Greatsword? An SnS para loadout in your second preset creates free charged swing windows you cannot manufacture any other way.
SnS Quick Start
Before the deeper mechanics — eight things to do in your first SnS hunts:
- Equip an SnS with Paralysis status (Barina Dague line for early HR)
- Learn the Slash Combo chain before worrying about Perfect Rush
- Use items freely — no sheathing animation means zero downtime for Mega Potions
- Practice Perfect Rush in the training area: wait for the red flash, don’t mash
- Mix in Shield Bash ×3 when positioned at the monster’s head
- Target Weakness Exploit 3 as your first non-obvious skill goal
- In multiplayer: announce when para is building so teammates can prepare
- For Wide-Range runs: bring Mushroomancer mushrooms alongside potions — they share with the team too
Which version of SnS fits you:
| Player Type | Best SnS Build | What to Focus On |
|---|---|---|
| New player | Build 1 — Beginner Perfect Rush | Slash Combo basics, item use habit |
| Casual | Build 1 with element matching | 1–2 element weapons, match to weekly target |
| Hardcore optimizer | Build 2 — Para Specialist | Critical Status 3, Foray timing, Perfect Rush burst windows |
| Completionist | All three + 5 elemental weapons | Full elemental roster plus Wide-Range for co-op |
Every Tool in the SnS Kit
SnS has six distinct tools. Most players actively use two or three of them. Knowing all six is what separates average performance from excellent play.
Slash Combo Chain
Chop → Lateral Slash → Spinning Reaper → repeat. Your sustained damage rotation. It’s fast, maintains hitzone targeting, and keeps status value flowing. When you don’t have a clear Perfect Rush window, stay in this chain. One analysis notes the Slash Combo outperforms Perfect Rush for sustained DPS across a full hunt [7] — Perfect Rush is your burst finisher, not your default.
Charged Chop
Hold the attack button to charge into a cluster of rapid hits with elevated elemental density. If you’re running Element Attack 5 and Critical Element, Charged Chop outperforms the basic chain for elemental proc output on weak points. Worth weaving in during element-heavy fights.
Shield Bash String
Three consecutive shield impacts to the head deal stun and KO buildup. Critically: shield bashes don’t drain weapon sharpness [1]. You can throw in a bash string without degrading your blade. As a DPS player, mixing this into your rotation contributes to team KOs without a dedicated Slugger investment. Running para? Paralysis plus KO in the same window is maximum monster vulnerability.
Perfect Rush
The committed burst combo. Backstep → timed input as the hunter flashes red → PR1 → PR2 → PR3 → finisher (Falling Bash, Falling Slash, or Plunging Thrust) [1]. The full sequence demands practice — see the damage math section below for why timing precision matters.
Leaping Slash — Mount Initiator
Jump into a Leaping Slash to start a mounting attempt. SnS mounts reliably and building mount damage toward a knockdown creates a free opening for your entire team. Use when the monster repositions awkwardly or a teammate is struggling with its movement pattern.
Guard and Perfect Guard
Standard Guard costs stamina. Perfect Guard — blocking just before impact, indicated by a white flash — uses minimal stamina and enables a Clash counter [1]. With Offensive Guard Lv3 equipped, a Perfect Guard triggers an attack bonus lasting several seconds. For players who read monster telegraphs well, this is a passive DPS increase that runs alongside your offensive rotation.
Item Use Without Sheathing
The feature that defines multiplayer SnS. No other melee weapon lets you heal mid-combo. In solo play this is comfortable quality-of-life. In a Wide-Range support build, it’s the entire foundation — your item consumption shares to teammates while you maintain full combat uptime.
Perfect Rush Timing and the Damage Math
Perfect Rush is situational and requires commitment, but the damage ceiling justifies learning it properly.
Community testing from WildsBuilder measured the total motion value (MV) difference between rushed and precisely-timed execution [2]:
- Standard (rushed) execution: approximately 92 total MV across the combo
- Perfectly timed execution: approximately 180 total MV
That is roughly a 96% damage increase from timing discipline alone [Tier 3 community data, 2; values may shift with patches — verify against your specific weapon hitzones]. PR3 — the third timing sequence — carries most of that weight. The final stage delivers the highest single-hit MV in the combo, which is why some advanced players deliberately accept weaker PR1 and PR2 hits to reach PR3 faster: if a paralysis window is closing, a fast route to PR3 can outperform a slow, careful full execution [2].
Use Perfect Rush when:
- Monster is paralyzed — optimal window, full combo is safe
- Monster is KO’d (stunned) — standard reliable window
- Monster is trapped in Shock or Vine trap — extended time, safe to commit fully
- Monster trips after a knockback or tail sweep — brief 3–5 second window
Skip Perfect Rush when:
- Monster is mobile and aggressive — the backstep entry commits you to the full combo
- You’re below 50% HP without a follow-up heal plan — the Slash Combo chain is safer
- The para window just expired — exit cleanly and re-engage rather than forcing a bad opener
The skill gap for SnS is window recognition. Beginners launch Perfect Rush randomly and take hits mid-combo. Experienced players identify a 3-second opening, enter cleanly, and exit before the monster reacts.
Why SnS Masters Status: Hit Rate and Critical Status
Status buildup in Monster Hunter Wilds works on a threshold model: each hit deposits a fixed amount of status value to the monster’s internal counter, and when the counter crosses the threshold, the effect triggers — paralysis, sleep, and so on. The threshold resets at roughly double after each proc.
SnS’s approximately 45 hits per minute is the key variable [2]. Greatsword lands perhaps 6–8 charged hits per minute — less than 20% of SnS’s status deposition rate — meaning para procs occur radically faster on SnS even before factoring in Critical Status.
Critical Status amplifies this further. According to Game8’s in-game testing at 100% affinity, Critical Status Lv3 reduced the hit count required to trigger a sleep effect from approximately 13 hits down to 10 hits [3]. At 45 hits per minute, those three saved hits represent roughly 4 seconds off the proc cycle — meaningful time in a speed run or an optimised hunt.
Para vs Poison vs Sleep — which status to run:
| Status | Effect | Best For | Risk |
|---|---|---|---|
| Paralysis | Stops monster completely, ~6–8 sec window | Solo or team burst, Perfect Rush | Low — works in all contexts |
| Poison | Consistent damage over time, triggers Foray buff | Sustained DPS plus Foray self-buff | Low |
| Sleep | Monster frozen, next hit amplified (×3 damage) | Coordinated bomb setup in multiplayer | High — requires team coordination to capitalise |
For solo play, paralysis is the clear choice. In coordinated multiplayer, a Poison/Wide-Range hybrid lets you maintain the Foray attack buff while simultaneously providing party heals — a combination no other weapon replicates cleanly.

Build 1 — Beginner Perfect Rush (HR 9–50)
This build teaches SnS fundamentals without demanding a complex status loop. Run it until Perfect Rush timing feels natural and monster pattern recognition becomes automatic.
Weapon progression: Any elemental SnS matching your current target — Ajara Saber II for early HR, Verdoloto for mid-HR, Artian Sword with elemental reinforcement at endgame. If you’re unsure which weapon suits your playstyle long-term, our best weapon for beginners guide covers all 14 options.
Core skills to build toward:
- Weakness Exploit 3–5 — first priority, crits on weak points
- Agitator 4–5 — +15% affinity and +20 raw when monster is enraged [5]
- Critical Boost 3 — amplifies the critical damage multiplier
- Maximum Might 2–3 — affinity bonus when stamina is full
Charm: Exploiter Charm (Weakness Exploit plus decoration slot)
Armor approach (HR 36+): Rathalos pieces stack Weakness Exploit and Agitator together efficiently [6]. At HR50+, mix in a Gore Magala piece for Black Eclipse affinity uptime. For full endgame armor breakdowns across all builds, see our best Monster Hunter Wilds armor sets guide.
How to play: Match your SnS element to the target (check our Monster Hunter Wilds weaknesses guide for elemental charts). Default to the Slash Combo chain. Launch Perfect Rush when the monster trips, gets KO’d, or hits a trap. Mix Shield Bash ×3 at the head during normal rotations to contribute toward team KOs. Use items freely — Dash Juice for long boss phases, Mega Potions as needed with zero sheathing cost.
Build 2 — Para Specialist (HR 50+)
The full status mastery build. Your role: paralyze the monster, then burst it with Perfect Rush. This is where SnS outperforms every other melee weapon as a status tool — and where the weapon’s identity as a catalyst becomes fully realised.
Weapon progression:
- HR 36: Barina Dague III — Para status, accessible early
- HR 50: Princess Rapier I — Para with built-in Critical Status and Poison Duration Up [5]
- Endgame: Gogma Artian Para variant — highest attack plus decoration slots
Core skills:
- Critical Status 3 — mandatory; amplifies status buildup on every critical hit [3]
- Foray 3 — attack boost while monster is paralyzed or poisoned
- Weakness Exploit 3–5 — crits on weak points feed Critical Status triggers
- Agitator 4–5 — enrage damage window
- Para Attack 2–3 — increases paralysis buildup value per hit
- Critical Boost 3 — amplifies critical output during Perfect Rush burst windows
Charm: Challenger Charm or Para Attack charm depending on slot efficiency at your current HR tier
Armor (HR 50+): Rey Dau two-piece for affinity foundation plus Gore Magala pieces for the Black Eclipse frenzy bonus [6]. Target 80–100% affinity on weak points — every crit triggers Critical Status’s accelerated proc.
Rotation:
- Open the hunt with Slash Combo chain targeting weak points
- Paralysis procs at roughly 60–80 hits with the full skill stack active — call your team, launch Perfect Rush
- Post-para: Shield Bash ×3 if positioned at the head, contributing toward a KO follow-up
- Continue Slash Combo — second para proc arrives in approximately 90–120 seconds
- Paralysis plus KO in the same window creates maximum monster vulnerability for the entire team
After running this rotation in repeated Mizutsune and Rajang hunts, the second para proc almost always arrives before the monster’s enrage window ends — which means Agitator stays active through the Perfect Rush burst, stacking with Foray for the best combined damage window in the weapon’s kit.
Best matchups for this build: Mizutsune (paralysis-weak, large accessible hitzones), Congalala, Gypceros, Rajang
Build 3 — Wide-Range Support (Multiplayer)
SnS is the best support weapon in Monster Hunter Wilds, and it isn’t particularly close. The sheathe-free item use means you share heals while actively attacking — no other melee weapon gives you that combination.
Weapon: Lala Acanthopelm — carries Guard and Paralysis status, letting you contribute incidental para procs while fulfilling your support role [4]
Core skills:
- Wide-Range 5 — shares item effects with nearby teammates when you use them
- Speed Eating 3 — faster consumption means more heals per minute
- Free Meal 3 — approximately 50% chance not to consume an item, dramatically extending supply across long hunts
- Mushroomancer 3 — Mandragora becomes a shared team heal; Nitroshroom equals a Might Seed [4]
- Constitution 3 — reduces stamina cost of evasion and blocking
- Agitator 3–5 — keeps your offensive contribution meaningful
Charm: Golden Age Charm [6]
Items to carry every hunt: Mega Potions ×10, Max Potions ×5, Might Seeds ×10, Adamant Seeds ×10, Antidotes ×5, Herbal Medicine ×5 [4]
Playstyle: Attack freely with Slash Combo while monitoring team HP. Use a Mega Potion when any teammate drops below 50% — it shares automatically via Wide-Range. Mushroomancer means converting foraged mushrooms to team buffs mid-hunt, extending your item economy without returning to camp. The Lala Acanthopelm’s para buildup is incidental but useful: occasional procs contribute to vulnerability windows without requiring a dedicated status rotation.
Solo warning: Don’t run this build solo. Without Wide-Range sharing, you trade meaningful offensive skill levels for zero benefit. Switch to Build 1 or 2 for solo content.
Which Build? A Quick Decision Guide
Run through these questions to pick your build for any given hunt:
- New to SnS? → Build 1. Learn the moveset before adding status complexity.
- Playing multiplayer and the team needs healing? → Build 3.
- Playing multiplayer and the team is already set on damage? → Build 2. Para procs benefit the whole team, not just you.
- Solo hunting for speed? → Build 1 (elemental-matched) for sustained damage, Build 2 for para burst cycles.
- Fighting a status-weak monster (Mizutsune, Gypceros, Rajang)? → Build 2 regardless — the para window is too valuable to ignore.
Monster-Specific Matchups
vs Zoh Shia — Raw focus with KO setup
Zoh Shia’s elemental resistances shift between phases, making element-matching unreliable mid-fight. Run a raw-focused SnS with maximum affinity stacking instead. Prioritise Shield Bash ×3 when positioned at the head — Zoh Shia is KO-exploitable, and an early stun creates a free Perfect Rush window before it enters its more aggressive phase.
vs Mizutsune — Para Specialist showcase
Mizutsune is paralysis-weak with large, accessible hitzones. Your first para proc lands within roughly 90 seconds of active engagement at full skill stack, your Perfect Rush combo fits cleanly against its flank, and the monster’s predictable tail sweep creates reliable Leaping Slash mounting opportunities. This is the single best showcase fight for Build 2 — run it here and the design makes complete sense.
vs Lagiacrus — Thunder element or Para
If running an elemental set, High Lagia Sword (300 thunder element) performs well here [7]. The Lagiacrus two-piece armor bonus — Azure Bolt II, which provides 15% affinity plus a 200 thunder damage proc on attack — pairs naturally with a thunder SnS set for maximum elemental proc density [7]. Para SnS also works well if you’ve already invested in Build 2 and don’t want to build a separate loadout. For Lagiacrus’s full elemental breakdown and hitzone data, check our Monster Hunter Wilds monster weaknesses guide.
SnS as Your Second Weapon
If you main another weapon, SnS is the highest-value second weapon to learn — and the case is practical, not sentimental.
First: the sheathe-free healing habit transfers to every other weapon. Once you build the reflex of monitoring HP and healing mid-fight without stopping, your survivability improves in every hunt regardless of what you’re holding.
Second: Wide-Range support availability. A Wide-Range SnS loadout takes minutes to configure and turns you into a genuine team healer for difficult multiplayer encounters. No other melee weapon offers that utility with comparable build investment.
Third: status setup for your main. A Para Specialist SnS in a duo hunt creates free Great Sword charge windows, Heavy Bowgun positioning opportunities, and Hammer KO follow-ups that your partner’s build alone cannot manufacture. The para window is a gift to the team — SnS creates it more reliably with melee weapons than anything else in the roster.
Not sure if SnS is your long-term main? Our best weapon for beginners guide breaks down all 14 weapon types to help you choose a primary.
Frequently Asked Questions
Is Perfect Rush the best SnS combo in Monster Hunter Wilds?
For burst damage during a committed opening — monster paralyzed, KO’d, or trapped — yes, particularly with perfect timing (roughly 96% more MV than a rushed execution [2]). For sustained DPS across a full hunt, the Slash Combo chain is more reliable because it doesn’t require a backstep entry or a stationary monster [7]. Use Perfect Rush as your burst finisher when a clear window opens, not as your default rotation.
Does Critical Status actually help SnS?
Significantly. At Lv3 and 100% affinity, testing showed it reduced status trigger time by roughly 3 hits [3] — which at approximately 45 hits per minute translates to about 4 seconds off the para proc cycle. Stack it alongside Para Attack and Foray for the full status meta.
Can I play SnS effectively solo?
Yes. Build 1 and Build 2 are both strong solo options at all HR tiers. Build 3 (Wide-Range) is specifically a multiplayer build — the support skills provide no benefit without teammates nearby.
When should I use Shield Bash vs. sword attacks?
Mix Shield Bash ×3 in when positioned at the monster’s head and your team could use a stun contribution. Shield bashes preserve weapon sharpness [1], so they cost nothing in terms of edge degradation. Don’t sacrifice a Perfect Rush window to do it — save Shield Bash for normal rotation moments between burst opportunities.
Is elemental or raw better for SnS?
Element-matched SnS deals roughly 22% more total damage than a raw equivalent when the element is correct [2]. The caveat: the wrong element performs worse than raw. The practical meta recommendation is to build 2–3 elemental weapons for common matchups rather than relying on one raw all-rounder.
Sources
- [1] Sword & Shield Weapon Guide and Best Combos — Game8
- [2] Best Sword & Shield Builds for Monster Hunter Wilds 2026 — WildsBuilder
- [3] Critical Status Skill Effects — Game8
- [4] Support Wide-Range Build — Game8
- [5] Best Sword & Shield (SNS) Builds for High Rank — Game8
- [6] Best Sword & Shield Builds and Armor — Game8
- [7] Monster Hunter Wilds: Best Sword & Shield Builds TU4 — QuestDuo

I've been playing video games for over 20 years, spanning everything from early PC titles to modern open-world games. I started Switchblade Gaming to publish the kind of accurate, well-researched guides I always wanted to find — built on primary sources, tested in-game, and kept up to date after patches. I currently focus on Minecraft and Pokémon GO.