

On Day 1 you can craft 6 things. On Day 4, if you make one specific decision, you can craft over 80. That gap isn’t random — it’s the difference between players who survive their first winter and players who freeze on Day 19 wondering why their base isn’t coming together.
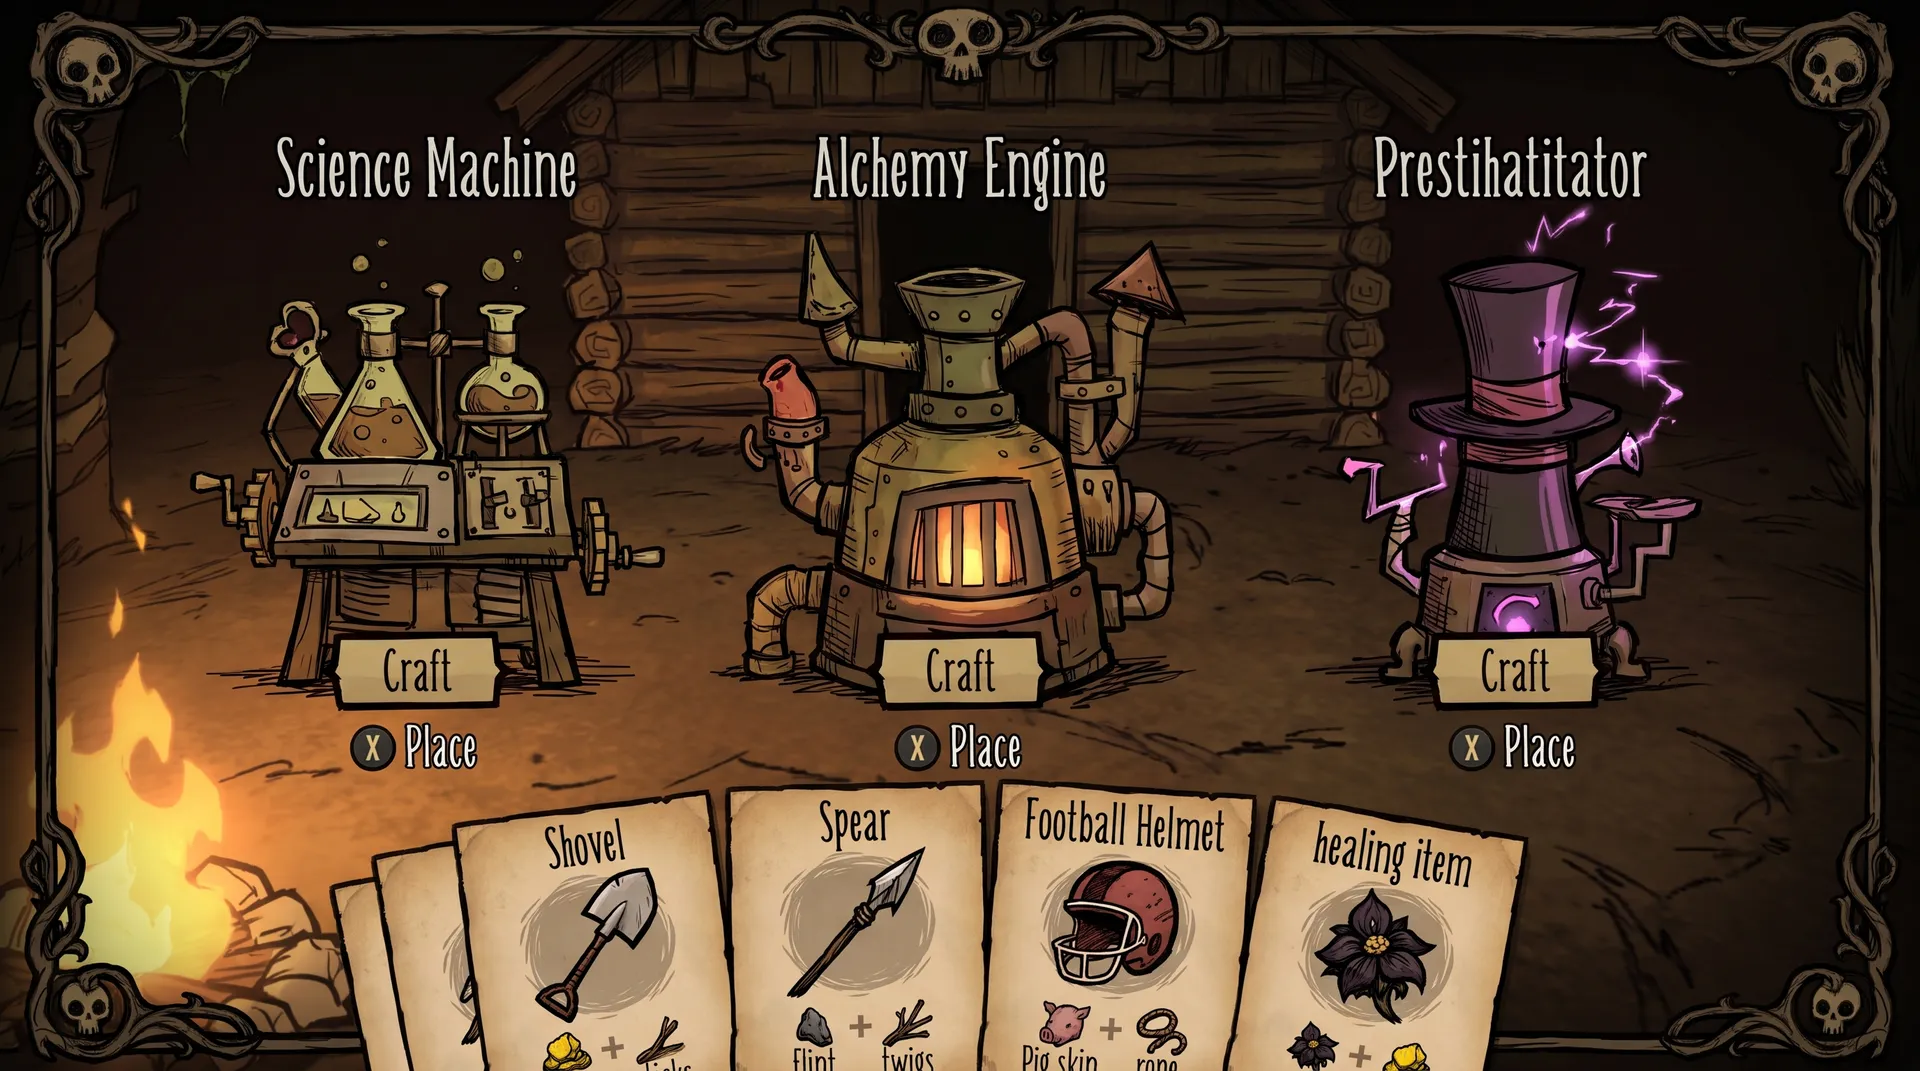
DST’s crafting system is built around five tiers of stations, each gating a chunk of the recipe list. Most guides will tell you “unlock the Alchemy Engine early.” This guide tells you exactly why Day 4 is the target, what you need to get there, and what to prototype the moment you do. It covers every tier — Science Machine through Celestial Altar — so you understand the full progression curve, not just the early-game scramble.
Verified against Don’t Starve Together (May 2026). Klei patches mechanics regularly — confirm specific values in-game if you’re playing post-update.
If this is your first time in DST, see our Don’t Starve Together Beginner’s Guide for survival fundamentals before diving into the full crafting system.
Quick Start: 5 Crafting Priorities Before Day 10
If you want the short version, here it is. The rest of the guide explains the mechanisms behind each step.
- Day 1–2 — Gather 1 Gold Nugget, 4 Logs, 4 Rocks. Build the Science Machine. Prototype: Axe upgrade (Luxury Axe), Backpack, Fire Pit, Spear, Log Suit.
- Day 3 — Collect 4 Boards, 2 Cut Stones, 2 Electrical Doodads. Stock these before moving camp.
- Day 4 — Build the Alchemy Engine. This is your single highest-leverage action in the first month. Immediately prototype: Thermal Stone, Ice Box, Ham Bat, Walking Cane.
- Days 5–15 — Gather 4 Rabbits (use traps), 4 Boards, 1 Top Hat. Build the Prestihatitator. Prototype: Life Giving Amulet, Pan Flute, Meat Effigy.
- Days 20–40 — Farm Nightmare Fuel from low-sanity shadow creatures. Build the Shadow Manipulator. Prototype: Dark Sword, Night Armour, Telelocator Staff.
How DST’s Crafting System Actually Works
DST uses a prototype-once, craft-anywhere model. Stand next to a crafting station, prototype a recipe, and that recipe unlocks permanently — you can craft it in the middle of a forest on day 200 without the station nearby. This matters because it means the station itself is a one-time unlock cost, not a permanent dependency.
The five tiers are gated by which station you’ve built:
| Tier | Station | Recipes Unlocked | When to Build |
|---|---|---|---|
| 1 — Science | Science Machine | ~30 core items | Day 1–2 |
| 2 — Advanced Science | Alchemy Engine | ~60+ mid-game items | Day 4 (target) |
| 3 — Magic | Prestihatitator → Shadow Manipulator | ~25 magic items across two stages | Days 10–40 |
| 4 — Ancient | Ancient Pseudoscience Station (Ruins) | 14+ thulecite items | Post-cave access |
| 5 — Celestial | Celestial Orb / Altar / Tribute / Sanctum | ~10 lunar items | Lunar Island access |
The crafting UI organises everything into Quick-Craft Tabs by category (Tools, Survival, Food, Science, Fight, Structures, Refine, Magic, Dress). Once prototyped, items appear in these tabs without needing the station again.
Tier 1: The Science Machine (Day 1–4)
The Science Machine costs 1 Gold Nugget, 4 Logs, and 4 Rocks. Gold is the only bottleneck — it spawns near boulders or can be found in surface ruins. Build it as early as Day 1 if you find gold.
Prototyping at the Science Machine grants +15 sanity per recipe, which matters during early-game when sanity is harder to manage.
Top 5 Science Machine Prototypes
| Item | Cost | Why It Matters |
|---|---|---|
| Backpack | 4 Twigs, 4 Grass | 12 inventory slots vs. 8 — changes how much you can carry on resource runs |
| Spear | 2 Twigs, 1 Flint, 1 Rope | 34 damage vs. 17 for bare hands; your only reliable early weapon |
| Log Suit | 8 Logs, 2 Rope | 80% damage reduction; lets you tank hounds and spiders without burning through food |
| Fire Pit | 2 Logs, 12 Rocks | Permanent fire vs. temporary campfire; essential base structure |
| Crock Pot | 3 Cut Stone, 6 Charcoal, 6 Twigs | Converts raw ingredients into cooked meals with 2–3x the health/hunger value |
One tip most guides skip: once you build the Alchemy Engine, the Science Machine becomes redundant. The Alchemy Engine covers all Tier 1 recipes as well as its own. You can hammer the Science Machine for resources (it returns roughly 50% of materials) and use the space.
Tier 2: The Alchemy Engine — Your Compression Engine (Day 4–8)
This is the most important crafting milestone in DST. Not because the Alchemy Engine is the most powerful station — it isn’t — but because it unlocks the items that determine whether you survive your first winter.
Every day you delay the Alchemy Engine is a day you’re playing without the Thermal Stone, the Ice Box, and the Ham Bat. Winter arrives on Day 21 by default. Building the Alchemy Engine on Day 8 instead of Day 4 means four fewer days with a full toolkit. That gap shows up as scrambled winter prep, spoiled food, and undersized food reserves.
What You Need to Build It
- 4 Boards (4 Logs each = 16 Logs total)
- 2 Cut Stones (3 Rocks each = 6 Rocks total)
- 2 Electrical Doodads (requires Science Machine prototype: 1 Gold + 2 Twigs each)
- Science Machine already built (required for prototype)
The Day 4 target is achievable because Electrical Doodads only require prototyping at the Science Machine (which you build Day 1–2), and Boards + Cut Stones come from common surface resources. If you dedicate Day 2–3 to logging and mining instead of exploring, you have everything by Day 3 evening.

Top 10 Alchemy Engine Prototypes (Priority Order)
| Item | Cost | Why It’s Priority |
|---|---|---|
| Thermal Stone | 3 Rocks, 3 Flint, 1 Cut Stone | Your winter survival tool — keeps you warm near fires; without it you take cold damage every day of winter |
| Ice Box | 2 Gears, 2 Cut Stone, 1 Gold | Preserves food 2x slower; gears are the bottleneck (giants or tumbleweeds); prototype immediately when you have gears |
| Ham Bat | 1 Pig Skin, 2 Meat, 2 Twigs | 59 damage fresh (decays to 26) — the best weapon available before magic tier unless you’re Wigfrid |
| Walking Cane | 1 Walrus Tusk, 2 Gold, 4 Twigs | 25% speed boost; MacTusk drops the tusk in winter camps; dramatically speeds up map exploration |
| Hibearnation Vest | 8 Silk, 2 Rope, 4 Meat | +60 insulation vs. base 0; critical for winter without a Koalefant; silk comes from spider webs |
| Miner Hat | 1 Straw Hat, 1 Light Bulb, 2 Rope | Hands-free light; frees your torch slot for a weapon during cave exploration |
| Tent | 6 Silk, 4 Twigs, 3 Rope | Full sleep: restores max health + sanity; slower spoil vs. bedroll; your sanity reset button |
| Ice Flingomatic | 2 Gears, 15 Ice, 2 Electrical Doodads | Auto-extinguishes fires in summer; single most important summer structure |
| Birdcage | 2 Cut Stone, 6 Gold, 2 Boards | Converts excess fruit/veg to Eggs for omelettes (8 hunger + 1 health); passive food production |
| Rain Coat | 2 Tentacle Spots, 2 Rope, 1 Beak | 100% wetness protection for spring; skip if you have an Eyebrella already |
The Alchemy Engine also unlocks the Drying Rack (converts Meat to Jerky for long-term food storage) and the Pig House (passive bacon egg cheese pork production). These aren’t emergency prototypes but round out a functional base. [1][6]
Tier 3: Magic Crafting — Prestihatitator and Shadow Manipulator
Magic crafting splits into two sub-stations. You must build them in order — the Shadow Manipulator requires a Prestihatitator prototype first. Plan roughly Days 10–40 for this tier depending on how aggressively you farm its ingredients.
Stage 1: Prestihatitator (Magic Tier 1)
Cost: 4 Rabbits, 4 Boards, 1 Top Hat. Rabbits are caught in Rabbit Traps (Science Machine prototype: 2 Twigs, 2 Grass). A single rabbit-rich biome with 4 traps set before dusk fills your quota by morning — typically achievable Day 5–6 if you know where to look. Top Hats require 8 Silk at the Science Machine.
Like the Science Machine, prototyping at the Prestihatitator grants +15 sanity and has a 10% chance to spawn a free Rabbit. [3]
Priority prototypes at the Prestihatitator:
- Life Giving Amulet (3 Gold, 2 Red Gems, 1 Nightmare Fuel) — auto-revives you on death; your best insurance against permadeath before you have Meat Effigies stockpiled
- Meat Effigy (4 Boards, 4 Beard Hair, 40 HP) — costs 40 health to place but creates a free respawn point; pairs with Wilson for passive beard hair accumulation
- Pan Flute (5 Papyrus, 1 Mandrake) — puts all nearby mobs to sleep instantly; essential for boss fights and herd control
- Ice Staff (2 Nightmare Fuel, 1 Blue Gem, 1 Spear) — freezes targets; enables kiting large enemies you can’t otherwise approach
- Shadow Manipulator recipe — prototype this immediately so you can build the next station without returning to the Prestihatitator
Stage 2: Shadow Manipulator (Magic Tier 2)
Cost: 7 Nightmare Fuel, 3 Living Logs, 1 Purple Gem. This is a mid-to-late game push. Nightmare Fuel drops from shadow creatures that spawn when your sanity falls below 30%; Living Logs come from killing Treeguards or using a Deconstruction Staff on Wooden Things; Purple Gems are found in caves or from stalagmites.
Once built, the Prestihatitator becomes obsolete — the Shadow Manipulator covers all its recipes plus Magic Tier 2. Hammer the old station for material recovery. [2]
Priority prototypes at the Shadow Manipulator:
- Dark Sword — 68 damage, 100 uses, but drains 20 sanity per minute held. Use in short bursts on Wolfgang or Wigfrid who can offset the sanity cost. The highest base damage weapon before Ancient tier.
- Night Armour — 95% damage absorption with a sanity cost of 10 per minute. Pair with Sanity-boosting food (Taffy, Cooked Green Caps) so you’re not burning your mental state in a prolonged fight.
- Telelocator Staff — 4 Nightmare Fuel, 2 Living Logs, 1 Purple Gem. Teleports a target to a random map location. Invaluable for relocating the Bearger boss away from your base during autumn.
- Nightmare Amulet — deliberately induces insanity effects without losing actual sanity, letting you farm shadow creatures for 20–24 Nightmare Fuel per use. This is how you restock your magic crafting supplies sustainably.
The seasons guide is worth reading alongside this tier — understanding when seasonal giants spawn tells you when you need Night Armour and Fire Staff ready. Our DST Seasons Guide covers the full giant spawn calendar.
Tier 4: Ancient Pseudoscience Station (Ruins)
The Ancient Pseudoscience Station sits inside the Ruins biome, accessible through cave sinkholes. You’re not building this station — it already exists in the world. You use it in-place and prototype its recipes on the spot.
Getting there requires navigating the cave system through the Lightbulb Area and Lichen Biome until you hit the red-ground Ruins. The bigger risk is the Nightmare Cycle: a 600-second timer that cycles through Calm, Warning, Nightmare, and Dawn phases. In the Nightmare phase, shadow creatures spawn aggressively. Craft quickly during the Calm phase and retreat before the Warning phase ends. [5]
Many stations you find are broken, covering roughly half the recipe list. Repair with 32–34 Thulecite Fragments (or 6 Thulecite) to unlock the full set.
Top Ancient Pseudoscience Recipes
| Item | Why It Matters | When You Want It |
|---|---|---|
| Thulecite Crown | 90% damage absorption + regenerating force field; best head armor in the game | Before attempting the Ancient Fuelweaver boss |
| Thulecite Suit | Body armor with sanity regeneration — offsets the sanity drain from Dark Sword / Night Armour use | Pair with Dark Sword builds |
| The Lazy Explorer | Teleports you forward 10 units, 20 uses; dramatically speeds up Ruins navigation | Ruins farming runs |
| The Lazy Forager | Auto-collects nearby items; invaluable during high-stakes fights where bending down to loot gets you killed | Boss fights, Ruins farming |
| Houndius Shootus | Defensive turret; targets nearby enemies automatically; great for hound wave management | Established base defense |
| Magiluminescence | Sanity amulet that also provides light; best all-purpose amulet for cave exploration | Any cave or Ruins run |
Tier 5: Celestial Crafting (Lunar Island)
The Celestial tier requires reaching Lunar Island, which means building a Boat Kit and sailing there — typically a late-game goal. The Celestial Tab is accessed through four separate stations, each unlocking different recipes. [4]
The four Celestial access points:
- Celestial Orb — found inside smooth Meteor Boulders during meteor showers on Lunar Island. Unlocks the Moon Rock Idol (for character switching at the Celestial Portal) and Portal Paraphernalia (converts the Florid Postern into a Celestial Portal).
- Celestial Altar — assembled from components in the Lunar Mine Biome. Unlocks Moon Glass Axe (2.5x chop speed, 80 durability), Glass Cutter (68 damage, equivalent to Dark Sword without sanity drain), and Bath Bombs.
- Celestial Tribute — obtained by defeating the Crab King boss with Pearl’s Pearl equipped.
- Celestial Sanctum — crafted from components located via Astral Detector.
The Glass Cutter is the Celestial tier’s standout item for most players — it matches the Dark Sword’s 68 damage without any sanity cost, making it strictly better for characters outside the Wigfrid/Wolfgang meta who can’t afford the sanity drain.
Progression Path by Player Type
Different playstyles call for different tier priorities. Here’s where to focus based on how you actually play:
| Player Type | Priority Focus | Recommended Path | Skip Until Later |
|---|---|---|---|
| New Player | Survive first winter | Science Machine Day 2, Alchemy Engine Day 5–6 (don’t stress Day 4 yet), Thermal Stone before Day 21 | Magic and Ancient tiers entirely |
| Casual | Efficient base, no grind | Alchemy Engine Day 4, Ice Box from first gear drop, skip Shadow Manipulator until Day 30+ | Celestial tier (high effort, niche payoff) |
| Optimizer | Maximum toolkit, fastest | Science Machine Day 1, Alchemy Engine Day 4, Prestihatitator Day 8–10, Shadow Manipulator Day 20–25 | Nothing — hit every tier on schedule |
| Completionist | All recipes, all prototypes | Follow optimizer path; prioritise cave access for Ruins; unlock all four Celestial stations | Nothing; the goal IS the catalogue |
Day-by-Day Milestone Summary
| Day Range | Milestone | Key Prototypes |
|---|---|---|
| Day 1–2 | Science Machine online | Backpack, Spear, Log Suit, Fire Pit |
| Day 3 | Gather AE materials | Prototype Electrical Doodads at Science Machine |
| Day 4 (target) | Alchemy Engine built | Thermal Stone, Ham Bat, Walking Cane, Ice Box (when gears available) |
| Days 5–10 | Food system complete | Crock Pot, Drying Rack, Birdcage, Ice Box |
| Days 10–15 | Prestihatitator built | Life Giving Amulet, Meat Effigy, Pan Flute |
| Days 20–40 | Shadow Manipulator built | Dark Sword, Night Armour, Nightmare Amulet |
| Days 30–60 | Ruins access | Thulecite Crown, Thulecite Suit, Magiluminescence |
| Days 50+ | Lunar Island reached | Moon Rock Idol, Glass Cutter, Moon Glass Axe |
Frequently Asked Questions
Do I need to stay near the station to craft once I’ve prototyped something?
No — and this is the mechanic most beginners misunderstand. Prototyping costs station proximity once. After that, the recipe is yours permanently. The practical implication: prototype everything you think you might need in the next ten days each time you visit a station. Treat each visit as a prototype session, not just a crafting stop. Players who visit the Alchemy Engine once and prototype only what they need right now end up making avoidable return trips.
Should I build the Prestihatitator before I need the Shadow Manipulator?
Yes — but only once you have your Alchemy Engine established and a Crock Pot running. The Prestihatitator’s ingredients (4 Rabbits, 1 Top Hat) are cheap compared to the Shadow Manipulator, and getting it built on Day 10–12 means you can prototype the Life Giving Amulet early — which is worth more than any weapon as a permadeath buffer. Don’t skip it just because you’re not yet ready for Shadow Manipulator content.
Is the Celestial tier worth the effort on most runs?
For most players: partially. The Moon Rock Idol (character switching) and Glass Cutter (68 damage without sanity drain) are worth the Lunar Island trip. The rest of the Celestial catalogue is useful for completionists and players running long 200+ day servers. If you’re playing a shorter run or new server, invest that late-game effort into the Ruins first — Thulecite armour has a higher combat return than anything in the Celestial tab except the Glass Cutter.
Sources
- Alchemy Engine Guide — Basically Average
- Shadow Manipulator Guide — Basically Average
- Prestihatitator Guide — Basically Average
- Celestial Tab Guide — Basically Average
- How To Find The Ruins — Gamer of Passion
- Don’t Starve Together Beginner’s Guide — Gamer Empire

I've been playing video games for over 20 years, spanning everything from early PC titles to modern open-world games. I started Switchblade Gaming to publish the kind of accurate, well-researched guides I always wanted to find — built on primary sources, tested in-game, and kept up to date after patches. I currently focus on Minecraft and Pokémon GO.